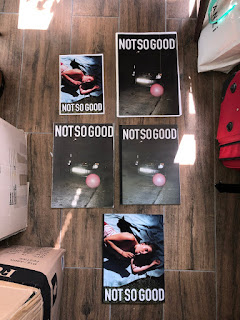
Final Magazine + Mockups
When I started putting together my first mockup-magazine I realised that it is a really long and complex process to get to your final piece.
Only concentrating on my Research and I actually believed that I could just put together the magazine in one day to have it ready for the presentation. After I had to desperately look for imagery that I could use for my magazine I had to confront the truth. I didn't do enough for the past few weeks and especially lacked photography. In my proposal I wrote that my final outcome would be a visual documentation, after experimenting with film in the first few weeks I decided to make a magazine since photography was my strength and I wanted to produce something you could physically engage with.
When I presented my magazine in the crit and my tutor for the first time the most noteworthy comment was that my photography was much stronger than my collages, therefore I decided to make my magazine solely a collection of editorials that would include also illustrations. Which meant that I would have to work really hard and do at least two shots a week to produce enough content.
 |
| All mockups + final piece |
As the weeks passed by I somehow managed to do quite a few photo shoots and most of them turned out to be quite good so that I could use them. But putting together the second mockup was so difficult. Just ramming in all the photography, still colleges and illustrations I couldn't understand my own concept anymore. One of the feedbacks from another crit was that my magazine was quite nostalgic, emotional and almost feels like a picture book. Then I went back into my research and I found that most of it was either linked to my own family or about my own family after the second world war. Since my project is about communication and bonding the generations I decided to make my magazine a sort of picture book that includes historical references and shootings inspired by my customer interviews and also images from my customer's youth. So that this magazine compares both youths, lives in a way that you could understand each other, maybe notice similarities or appreciate differences. After specifying my concept it was much easier to layout my imagery and also create a narrative, now I felt like I could actually convey the message understandable for someone who doesn't even know my concept so it was much easier to me to put together my third mockup. After uni, I passed around this mockup magazine with my notebook so that everyone could take their time to write their own feedback as I found that some people are quite shy or too nice in crits. Though I received really positive feedback and only little improvements within the layout which proved me that I was on the right track. One thing I still wasn't happy about was my illustrations within the magazine, I felt like it looked a bit random as I only had two so that I decided to take them out and use only photography.
 |
| paper cutter at prototyping |
 |
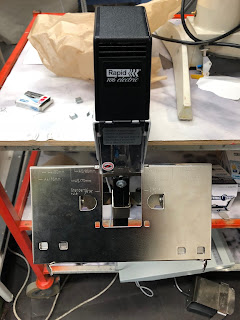
| stapler at Prototyping |
Whilst I was binding my magazines, always trying to improve my binding techniques I started using prototyping. There you can staple through a magazine but also cut the edge of a book. Meanwhile, my friend went to print her magazine professionally in A3 and it turned out to be really difficult in this size and their binding technique was even simpler than mine. For my third mockup, I decided to use recycled paper (A3) to give it a vintage look and print it with a normal printer at uni. After trying the printers on every level I found that the one on level 6 works the best. Throughout my feedbacks, people kept saying that they really liked the paper and quality of the images so I decided to try binding the magazine at uni with what I had. I liked the idea of making everything, from the imagery to the final piece myself. Considering that I wouldn't have a big choice of paper and binding at a print shop and that the outcome would eventually look even less professional I decided to make my final magazine.
After numerous tries with paper types and printers, I found a way to make it look so professional that you couldn't even distinguish it from a professional binding. I printed the magazine on 90% on A3 paper so that I would have ages that I could neatly cut off later and prevent any white gaps caused by the printer. And then leaving the edge on the left side to staple through it and later cut it off close to the edge to use a fabric tape I bought to cover the edges and make it look more professional.
Only through going this really long and complex process of making the final piece I realised how much work actually goes into a magazine or any print. From the time I put together my first mockup probably weeks passed by I exclusively worked on my final piece so that I know now that it definitely takes more than one day, even though the research was as important.
Having this experience was so important to me as I feel much more confident now starting my degree in Fashion Communication and Promotion knowing more about publication and solving problems with a much better feeling of time managing.


Kommentare
Kommentar veröffentlichen